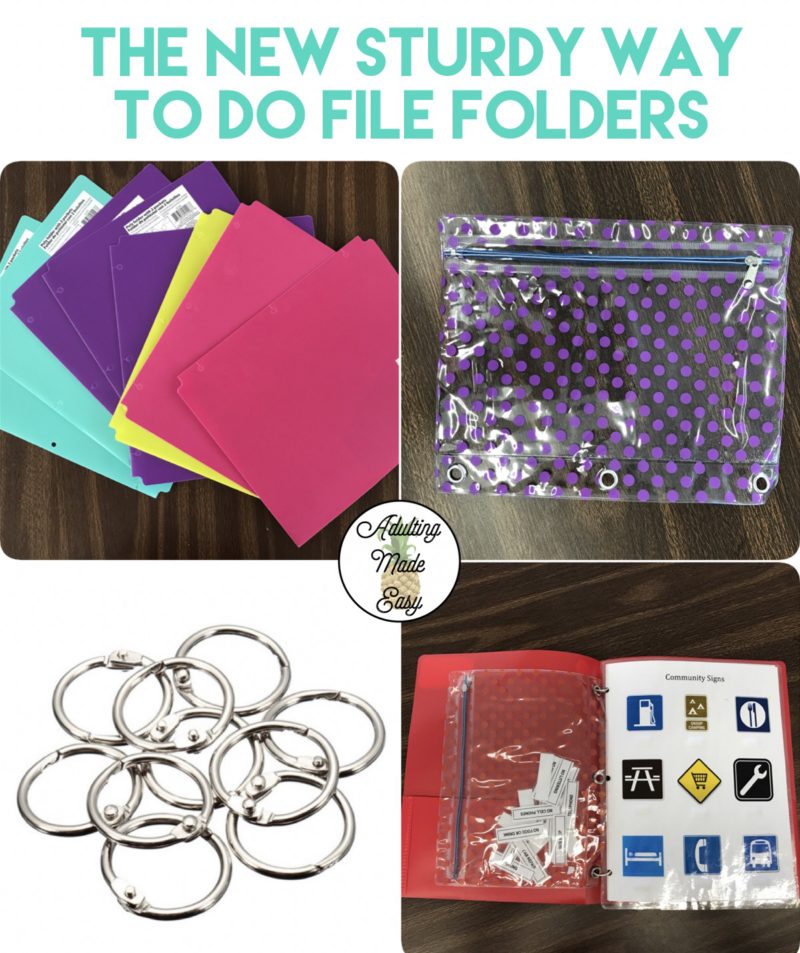
I used to make file folders the traditional way with manila folders when I had access to a large laminating machine. It was cheap, easy to assemble, and made for great filing organization. When I came to my new school, there was only a “one page” laminator, so I even went to the lengths of using shipping tape to protect my precious file folders. ? After spending way too much time and tape making a folder, I was determined to find better solution. This new file folder system is going to cost a little more, but I promise it’s worth every penny. Think of it as an investment! Introducing, the new durable file folder!

Step One
Purchase poly folders with 3 hole punches. I love these because they are heavy weight material and they can withstand dirty hands, moisture, being thrown… whatever happens in your classroom. These can run pretty expensive when they are not on sale, but if you find them during “school supply” season or a sale, you can get them for as little as 25 cents! I’ve purchased mine at various places like Amazon.com, they occasionally have 10-pack, 20-pack, 30-pack… etc. deals. Lately I’ve been finding them at Walmart in various cute colors for $0.25-$0.98

Step Two
Laminate your single pages that will go in the folder. The nice part about this was I was saving time from cutting and pasting onto a manila folder. I just directly print out the worksheets I want to use, and I can put multiple pages within a folder. To save laminating sheets, I will put worksheets back to back.
Step Three
If you’re not using dry erase marker to complete the worksheets (easily erasable on laminated sheets and makes for great reusable worksheets), follow the usual plan of cutting, laminating, cutting and velcroing the answer pieces to the worksheets.

Step Four
Here’s where you’re going to save some extra velcro, because that stuff is not cheap. I used to also put my answer pieces in a zip lock bag or laminated envelope and stapled them to file folder (if I didn’t Velcro the pieces to the folder itself), but those options weren’t very durable. So here’s a few durable options:

Just like the folders, you can pretty much find zipper binder pockets (or pencil pouch) anywhere, and cheaper during a sale or school supply season. These can range in price from $0.50-$3.50. If I’m in a hurry, I know I can usually find them for $1 at the Dollar Tree.

I found these medium vinyl zip bags in a pack of 100 on Amazon. They aren’t available at the moment, but it was about $10 (that’s 10 cents per pouch!) The only downside is they do not come hole punched, but they can easily be hole punched.
Step Five
Putting it all together. Put your Velcro answer pieces into a pouch and stack it on top of your line up of laminated worksheets and place them inside the poly folder. Using two loose-leaf rings, bind materials together and you have yourself a new sturdy, easy to flip file folder!

Step Six
Label and color code. This part will differ from teacher to teacher, depending on how you file your tasks. I use self adhesive color coding labels (Dollar Tree) to differentiate levels of each folder, levels 1-4: matching, word to picture, indirect matching, and miscellaneous folders (higher level). From there I have bins for each level. Another great idea is to set up an independent work filing system which is more complex, where each folder is numbered or lettered. You can even color coordinate by folder colors (I don’t have enough of each color to do this because I’ve purchased what was available when I see a sale).

Step Seven
Enjoy and share!
Update 6/23/17
@mrs_gs_special_learners found these folders at the Dollar Tree which have a pouch attached to them! Just hole punch so you can fit the rings through your materials, and you’ll save yourself some time and money from shopping for folders and pouches! Thanks for the share Amanda!!


